Showing posts with label Grey. Show all posts

Chevrons with a Hint of Shimmer


Hi everyone! This post I have chevrons to show you. Chevrons on nails is something I never seem to get tired of, even after all this time. They can be so subtle and yet give your nails something edgy at the same time. I just love it!

For this mani I combined a murky purple-grey color with a nice shimmer to add a bit of elegance. The green-blue shimmer polish is H&M's Lady Luck. I applied one sheer coat of it, which dried quickly so after a couple of minutes I was able to make the chevron shapes, using trusty tape strips and a layer of Bleu Asphalte from Bourjois.

I hope you like it, and if you would like to see more of the chevron manis I've done, just head over here. Thanks for reading and see you soon!

31 Day Challenge, day 23: Inspired by a Movie


Hi everyone! For day 23 of the 31 Day Challenge my nails are inspired by the movie My Neighbor Totoro. It's impossible not to love all the cute characters in it! :3 So on my ringfigner I made the giant totoro. First I applied three coats of China Glaze Recycle (which I'm also wearing on the rest of my nails), then I used a striper polish in black to outline the head and ears. Finally I added the eyes, whiskers and other details and my cutie was complete. ^_^ Thanks for reading!

Foil Water Marble


I'd never thought I'd be able to do, let alone love, water marbling, but here I am with another marbled mani. This time I wanted to do a darker one, using H&M Kiss Goodnight and Orly Sweet Peacock, which is the sparkly blue.

From my last water marbling attempts, I've learned that not every polish is suitable for it, so I wasn't surprised when that was the case with Sweet Peacock. It was hard to draw neat, controlled petals in the polish. But that actually didn't bother me at all, as my nails were left with these beautiful, more natural swirls of polish instead. Clean-up, however, was less beautiful! Despite having taped my fingers before dipping them in the polish, it was almost impossible to get them clean. So I took these pictures the day after, when most of the foily shimmer was finally gone after a long and hot shower. ;-) Thanks for stopping by!

31 Day Challenge, day 20: Water Marbled


They say practice makes perfect, and I couldn't agree more. I once tried water marbling just after I started this blog: I looked up a few tutorials, prepared the stuff I needed for it and then failed miserably. "Never again." I thought to myself. But since the technique is included in the 31 Day Challenge, I had no choice but to give it another go. So last week I failed again, and again, and again. And again. But I learned from it. And now I can proudly say I can do it. Weeee!
Things I had the most trouble with were finding the right polishes (some dry too quickly), drawing the designs in the water (maybe from using the wrong polishes) and preventing air bubbles. Though I have to admit I completely forgot to follow tutorials first this time, so I ended up rediscovering some handy things that I vaguely remember from the first time I did it. Clever me! :') Guess I was just too excited to get busy.

The polishes I used for this mani are Sea Spray and Four Leaf Clover, both from China Glaze. They were excellent for water marbling, but next time I'll be experimenting with my stash of too-crappy-for-normal-application-polishes. Because let's face it, water marbling uses up a LOT of polish. Thanks for reading!

Suzi Skittle


As my recent water marbling attempts for day 20 of the 31 Day Challenge weren't exactly succesful, I'll show you this colorful taped skittle from the vault instead. The grey shimmer is OPI Suzi Skis In The Pyrenees Suede. It dries with a matte finish but with some glossy topcoat it looks just as stunning! On top I did a fifty-fifty tape mani by covering up half of the nails with tape and painting the other half with the following polishes:

Essence - Bella
P2 - Groovy Etos - #118
Essence - Sending You Kisses
Bourjois - Jaune Cab (#85)

In the meantime I'll practise more water marbling, I really want to be able to nail it! See you nex time!

Dark Zigzag


Hi everybody! Last post I showed you the amazing suede version of Suzi Skis In The Pyrenees from OPI. Because it dries so fast, it's a perfect basecolor for tape manis, such as today's. I covered half of my nails with triangle shaped pieces of tape and used my trusty black polish (Where's The Soiree? from Color Club) on top. Then I removed the tape strips and felt like a rock star... Rock on!

OPI - Suzi Skis In The Pyrenees Suede


Hello dear readers! I know it's been a while again, my apologies for staying away so long. I've been busy with packing and moving to a new place, and with concentrating on school. Or busy with life, in other words. ;) But my passion for nails is far from dead, so I'm trying my best to get back to posting regularly again. In the meantime I'll share some pictures from the vault with you, starting with OPI Suzi Skis In The Pyrenees, the suede version. I think it's absolutely gorgeous in all its simplicity. I really could look all day at that dark, grainy, matte finish. ♥ This was two coats. The application is alright; like with other matte polishes, you need to work faster because the drying time is quite short. But I like to see that as a plus, it makes this grey beauty an awesome polish for tape manis... ;)

31 Day Challenge, day 1: Red


That's right! I'm finally doing the 31 Day Challange! The task for day 1 is to make red nails and this is my attempt. Okay, so it's just as much grey as it is red. :-P But I decided to allow myself to have a little bit of freedom with this challenge, hope that's okay! ;-) For this simple fifty-fifty tape mani I started with a sexy red basecolor, #85 from Hema (a Dutch department store). When that had dried, I covered half of each nail with tape and painted the other half with a thin layer of China Glaze Concrete Catwalk and Tinsel Town. After removing the tape again, this is the end result; vampy and sparkly, can't say no to that! ^^

Because I'd like to enjoy the results of each challenge for more than just a day, I'm going to have to cheat a tiny bit with the original schedule of a challenge a day. As a compromise I promise to work twice as hard on each little project. ;-) Thank you for reading!

Nude with hearts


Hi guys! How are you all doing? :) I've finally finished all my exams for the first semester, so more time for blogging again! :)

For this post I wanted to share this semi-nude mani with you that I made last year. I wanted to make hearts on my nails by making a template with tape and this heartshaped paper punch that I have, but the punch had a hard time getting through the tape, so all I was left with was a little wrinkled, misshapen hole... So I cut out the shape myself from a fold up piece of tape and that's how I got to this design with V-shaped French tip. I still have to get used to nude nails, but I kind of like it like this. ^^ For the rest of my nails I was looking for a smokey purple, the polish that came nearest to what I wanted was Bourjois Bleu Asphalte. But I if I had Frederiksberg from WIC HerĂ´me at the time, I certainly would've gone for that instead, I love that color so much! :)

So what are your thoughts on these nude nails? Would you wear them yourself?

Grey cloud


Hi everyone! For this post a grey cloud mani to match with today's weather. On my accent nail I used China Glaze Recyle, a black creme and between those China Glaze Concrete Catwalk, which is what I'm wearing on the rest of my nails too. It's the best grey creme I've got. Just two smooth coats for an even, glossy finish. 

I don't wear greys on their own very often, usually I just need some color to go with it. You know, to brighten things up. However, I think today's mani is cute in all its greyness :) Do you wear greys a lot?

Blue and turquoise glitter cocktail


Hello everybody :) This is a layering mani I made with China Glaze Concrete Catwalk as my basecolor and a blend of blue and turquoise glitters on top. It was hard to capture how this looked in real life, it was quite pretty. All the hues kind of blended into one undefinable color, full of sparkles ^^ But under the direct light of the lamp which I took this mani under, it's not visible because of the bigger contrast between all the colors. It's still beautiful, but very different.
The bottom picture was taken in daylight the next day, it shows the blended effect a little better. (Excuse my tipwear :)) What do you guys think about this combination?


The glitters I used on top: a nameless blue and turquoise glitter from Claire's and Essence Edward 


Art Deco chevrons


Hello guys! First of all, I'd like to thank everyone who wished me a happy birthday in my last post, it was very nice to hear, but I just celebrated my birthday last month, haha. The birthday nails were specially made for a reader who requested a birthday mani for her own special day ;-) So no birthday presents to share with you, but I do have these elegant chevrons in Art Deco style. The pictured bottle of polish, which I used as my base color, is M91 from a new cosmetics brand called Make-Up Studio. They carry a huge, colorful collection of eye-shadows, lipsticks, blushes, brushes, fake lashes etc. and... nail polish :) They just opened a brand new store in our local shopping mall, so last week I went for a look and M91 was one of the products I came home with. It's a dusty green creme which is close to Mint in Wikipedia's List Of Colors. The formula was pretty nice but the best thing is it covers in one coat ^^ I own quite a few dusty, grey-ish greens/mints, but none of those is similar to M91. So I'm happy to have yet another one in my stash! It's a shame though, that Make-Up Studio didn't give their polishes a real name, instead of just a number. They've got quite a few unique babies in their collection that truly deserve more identity. I admit they do cost a lot (12.90 for 12ml/0.41fl.oz.) but as I said, some are really unique and worth the money, if you want to spoil yourself :) Anyhow, the day after I added the first chevrons with tape, using China Glaze's Jitterbug. The little chevrons at the tips were made with China Glaze Ink. It's a striper polish with a perfect covering formula, the thin brush is perfect for making stripes but also for freehanding, like I did here. It came in really handy, because I felt way too lazy to wait for another coat of polish to dry, like I would've if I used tape again. Finally a layer of Essence Matt top coat and tada! Thanks for reading :)

Orly zigzag


Hello everyone! Since I didn't have much time to do my nails this week to post something, I decided to dig in the vault, look what I found! It's a zigzag tape mani I did in the summer with China Glaze Recyle for the grey and Orly's Viridian Vinyl and Purple Pleather for the tips, they were amazing to work with for the taping by the way. I expected the colors and zigzag pattern to pop more against the grey, but it became quite subtle actually. Still I like the matte and glossy finish combined in this mani :) What do you think about it? Thanks for reading!
Gameboy nails


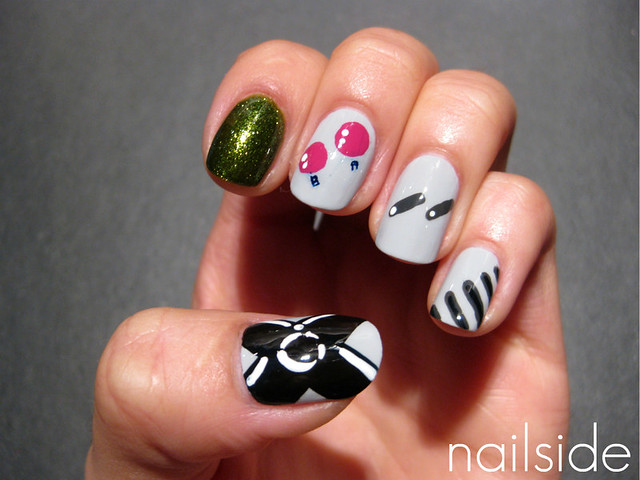
Hi guys, guess my nails! I'm not even sure if you can say that. And the title might've been a big hint haha... but they're gameboy nails :D I made these for a reader who is going to dress up as gameboy for halloween, how cool is that? I thought it was such a fun theme and was beyond excited to work on them. My base color was Essence Got A Secret and I freehanded all the gameboy features with a tiny brush. For the glamorous index finger I used Orly It's Not Rocket Science, it's supposed to be the screen. The screen's kind of green, right? ;-) Anyway, hope you like them and goodnight everybody! :)

Other polishes I've used:
OPI - Dim Sum Plum
China Glaze - Concrete Catwalk

Skittle and dots


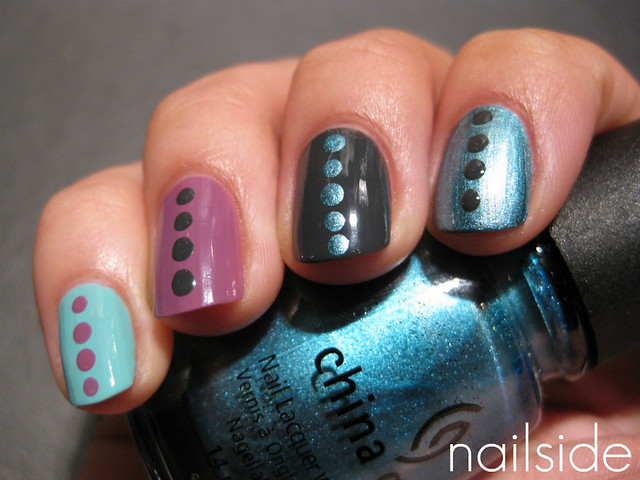
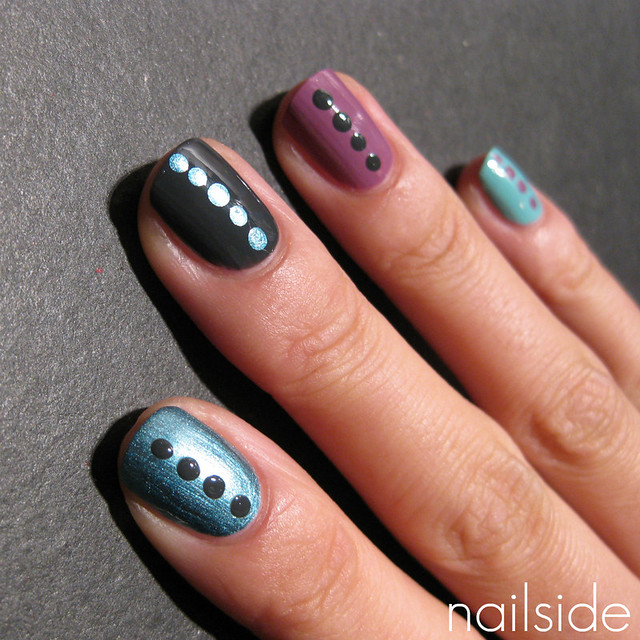
Hello nail polish friends! Today I decided to practice some dotting. I envy those who can make perfect, even-sized dots, like the talented girls from Emerald Sparkled, Another Bottle Of Polish and Rebecca Likes Nails. Click on the links to see some amazing dotting manis they made, too gorgeous! My own attempt was very modest though, but definitely something I would wear again. I love the big impact of dots and how they can be achieved with little effort. The polishes I used:

China Glaze - For Audrey
China Glaze - Concrete Catwalk
China Glaze - Adore
Color Club - Uptown Girl

In case you're wondering, I used the same colors for my thumbs as the one on my pinkies ;) Thanks for reading!

Stripey accents


Hello everyone :) I hope you guys had a nice weekend like I did. We had some late summer weather the last couple of days and I enjoyed it very much.

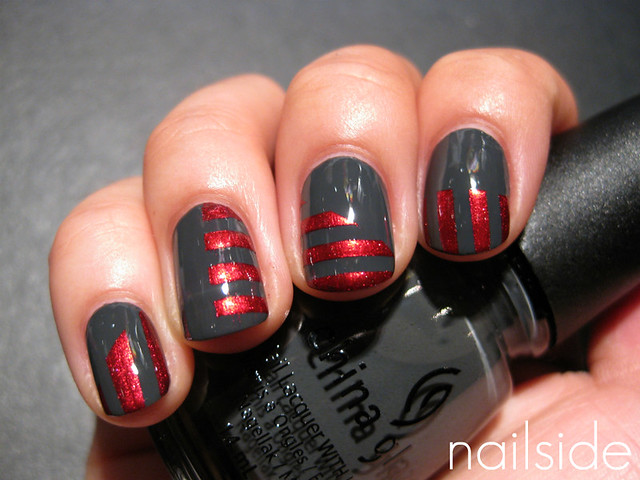
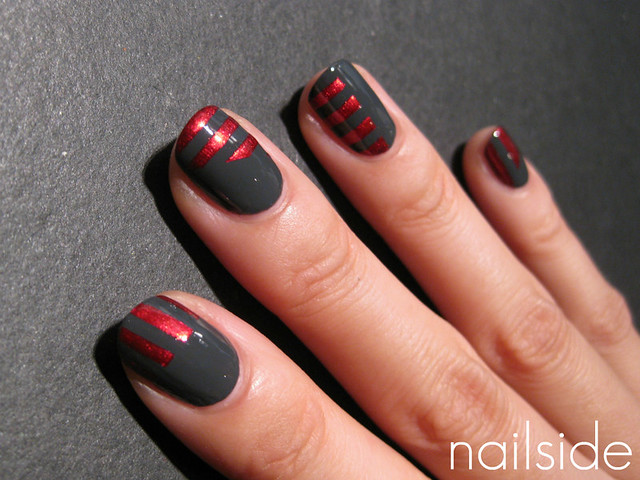
For this post I have stripey accents to share with you. I'm wearing one of my latest purchases, China Glaze Concrete Catwalk. I love the dark shade of grey and the polish applies like butter, just two smooth coats and you're done. Tonight I added the red, stripey accents, using tape and P2's Fever, I love this polish too! It's a deep, shimmery red, very glamorous and I love how it pops against Concrete Catwalk. Thanks for stopping by and have a great night!

V-gap


Hello everyone! For this post I'd like to show you another tape mani I did this weekend. I was wearing OPI Mrs. O'Leary's BBQ and the next day I wanted to spice it up, so this is what it became. It's not Sophy Robson's famous V-gap, but still a V-gap right? ;) It wasn't an easy choice finding a color other than black to suit the burgundy red of Mrs. O'Leary's BBQ, but then I remembered saying in a previous post how China Glaze Jitterbug just goes with any color, so this was my chance to prove it, haha. I think Mrs. O'Leary's BBQ looks really pretty with Jitterbug and that the whole design looks kind of editorial. I also mattified it to see what it would look like and I still haven't decided yet which version I like better... Help me out! Haha.
Thanks for reading! :)

Malificent lightning bolt


Hi guys! Today is another way too gloomy day. So I've got something from the vault for you. This is a lightning bolt mani I did a while ago. The combination of colors I used looked so dark and mysterious so the whole look instantly reminded me of Disney villain Malificent from the Sleeping Beauty. Man, I just love her. I think she's the most stylish and elegant from all the female Disney villains. As a kid I never realized how cool she was, but after all she was the bad guy, so I guess it's not that strange.

The polishes I used: the base color is Essence Where's The Party?, the purple foil (so gorgeous!) is Forget-Me-Not! from Catrice and the black Color Club Where's The Soiree?, as usual. I also added matt topcoat in the end, but I think that was a mistake, the true colors with a glossy finish would have been prettier. Oh, well! Thanks for reading!

Glitter overload

Hi everyone! Yesterday I showed you swatches of a pretty shimmer polish from Beyu, #325. The blue flecks were gorgeous in the bottle, but unfortunately they didn't show up that well on the nail. So I added more blue bling myself, as you can see in the first picture. It was amazing to look at, but then I wondered how it would look if I added more, different colored glitter... Only one way to find out!

So here's #325 with a blue glitter topper from Claire's.


Then I layered it with a red glitter, also from Claire's...


And finally a coat of Edward from Essence.


Sparkling!

And of course the inevitable matt topcoat, because I can't resist mattified glitter! :)


Thanks for stopping by!

Beyu - #325


Hello dear followers, today was a very gloomy day; really depressing and not good for nice pics! So here are some pictures I made a few weeks ago, on a bright and sunny day. Pictured is two coats of Beyu #325. To me, Beyu is a pretty unfamiliar brand, I've never heard about it from others or seen it on other blogs. Anyway, it has a modest but nice nail polish collection and next to polishes it also sells make-up. Among the nail polish collection are some regular colors (reds and pinks) but also a few quite interesting shimmer and glitter polishes and #325 is one of them. #325 is a dark grey shimmer polish with little, medium blue particles. Unfortunatey the blue isn't as noticeable on the nails as in the bottle, such a shame because it looked so promising! Despite of that I still like it. It's pretty unique and kind of edgy (and would look really gorgeous on short nails!). However, more of that blue wouldn't hurt :P So right after these pics I started sniffing around my stash for something blue to add on top. And how that turned out will be posted tomorrow! Hope you don't hate me now, hahah. Lots of pics! So I had to split it up :) So see you tomorrow!

Beyu #325 was €5.95 for a bottle of 8ml/0.27 fl.oz.

Close-up

Subtle blue shimmer