Showing posts with label Skittle mani. Show all posts

Sci-fi chic Skittle


Hi everyone! Today I have this sci-fi kind of skittle to show you. This mani started with the two semi-nude accent nails that I made using tape and freehanded strokes of polish. After that I went through all my drawers like a crazy person to find polishes that would match the accent nails. The result is an unusual combination of colors, which in hindsight, I'm not sure whether I love or hate. Doesn't matter, I enjoyed the process of doing these nails nonetheless. :)

The polishes I used:
Index finger: China Glaze Tinsel Town on top of China Glaze Westside Warrior
Middle finger: OPI Mrs. O'Leary's BBQ
Thumb and ring finger: Color Club Where's The Soiree and Barry M Cobalt Blue
Pinky: China Glaze Sea Spray

Happy Skittle

A big thank you to the lovely boyfriend for taking this picture for me! :-)

Skittles! Pretty much the easiest form of 'nail art'. This time I went for a bright and funky color scheme with four (once again) Essence polishes:

Let's Get Lost
Viva La Green
Lime Up!
Ultimate Pink

I just love these Colour&Go polishes! Their formula is just perfect most of the times, they cover in two coats and yes, they're small, but also very cheap (€1,29 for 5ml/0.16 fl.oz.) so you won't have to hesitate on buying a back-up of your favorite shade.

I didn't know pretty nails could affect my mood so much, but looking at today's mani just made my day over and over again, haha. I'm such a dork. :-P
Thanks for reading, guys!

Purples (and a pink)


Sometimes all you need for fun nails is color! Here I used a bunch of untried purples in a semi-gradient/ombre mani. I usually love my purples blue-toned, which is probably why I've never worn the three pinker colors before, but they look pretty cute together in a group. :) The polishes used from my thumb to my pinky:

H&M - Beauty Bandit (I love this name!)
Essence - Passion For Fashion
Essence - Break Through
Essence - Meet Me Now
Essence - Very Berry (Not so berry though!)

Thanks for watching everyone!

The Mad Dollies nails


Hello guys! Today's post is another custom mani, I abosolutely love doing these! I got this request from a player from the Greensboro NC roller derby team The Mad Dollies. She asked if I could come up with some fierce nail art designs, in her team colors teal and yellow, that she could use for an upcoming game. She also loved the use of tape for nail art, so the first thing that came in mind was a fierce lightning bolt tape mani! ;-) (Which all went great until my topcoat decided to smudge my hard work!) On my thumb and pinky I have the symbols that two certain players carry on their helmet. I made the star using tape and I really like the design, but it took a lot of precision to get all the tape strips right. So I'm still thinking of a more efficient way to make the design in the future. And the index and middle finger resemble the distinctive tights I saw players on pictures wearing, mostly striped or fishnet. And luckily I had Konadplate M57 to make the last :)

So Kristin, I really hope you like these designs! You can use all five of them or just pick the ones you like best ;-) And good luck with the rest of this season!

I really enjoy working on these custom nails requests I'm getting lately, so if you would like me to make some designs for a special event or just for fun, feel free to leave your idea in the comments or send me an email at: nailside@gmail.com.

Polishes I used in this post:
Essence Stamp Me! White
Essence - Let's Get Lost
Color Club - Almost Famous
Color Club - Where's The Soiree?
China Glaze - Ink

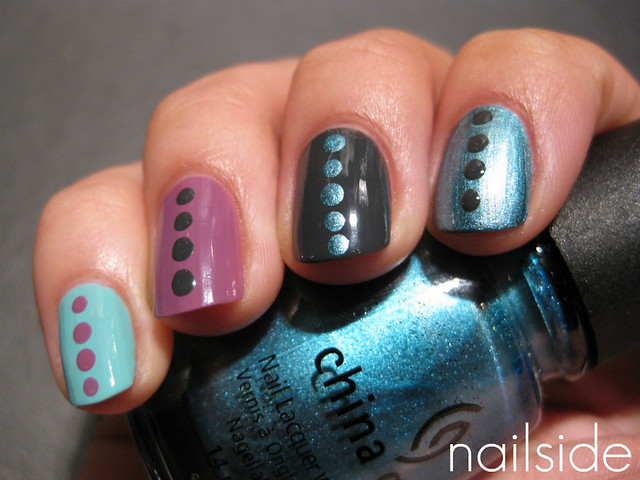
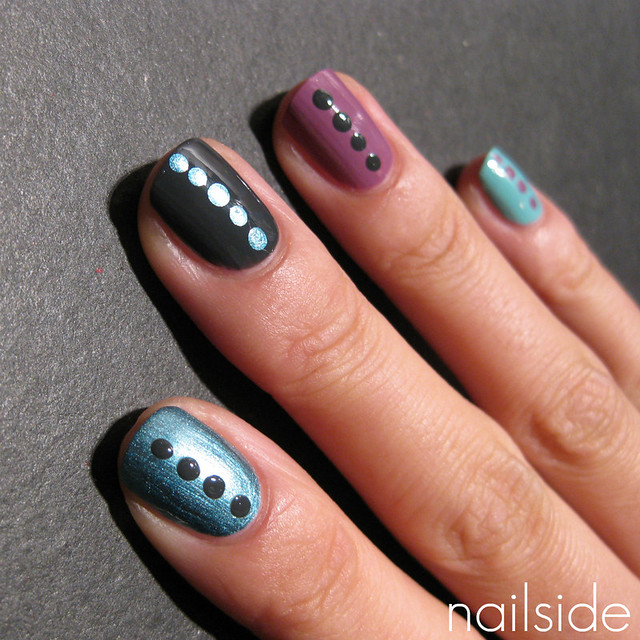
Skittle and dots


Hello nail polish friends! Today I decided to practice some dotting. I envy those who can make perfect, even-sized dots, like the talented girls from Emerald Sparkled, Another Bottle Of Polish and Rebecca Likes Nails. Click on the links to see some amazing dotting manis they made, too gorgeous! My own attempt was very modest though, but definitely something I would wear again. I love the big impact of dots and how they can be achieved with little effort. The polishes I used:

China Glaze - For Audrey
China Glaze - Concrete Catwalk
China Glaze - Adore
Color Club - Uptown Girl

In case you're wondering, I used the same colors for my thumbs as the one on my pinkies ;) Thanks for reading!

Mummy skittle

Hi guys! Yesterday I've posted my second Essence-only skittle. But as you may know by now, I'm not able to leave a skittle blank for too long, sooner of later the skittle gets bored and starts begging me for a little party. So that's what I gave it and it was mummy-themed.


And if you've read my blog regularly, you'll also know how I love mattifying my manis. And... that's how I messed up my skittle. See those little white spots? That's my Essence matt topcoat getting old. The poor fellow's been working too much and now he can't do his job properly anymore. The first time I had this problem, I just thought I hadn't been careful enough and that those spots were just dust floating in the air or something. But the spots weren't ON the surface so I could lift them up with my tweezers, they were IN the surface and had no intention of getting out. Then I noticed how I always ended up with those spots after I mattified it. So I bought a new bottle of matt topcoat and problem solved. The spots were caused by applying the matt topcoat with too thick coats which eventually happens as the polish gets goopier as it gets older. New bottles have a thinner formula and don't have that problem. So I added some thinner to my old bottle and now it's as good as new again. I absolutely loved my Essence matt topcoat, it works and it's cheap, so I was pretty bummed when I discovered those white spots - its only downside. But fortunately we've cleared that problem and now we're BFFs again. The end :)

Another Essence skittle


Hi everyone, for today's post I'd like to show you a cheerful skittle from the other day. All the polishes I used are from Essence, a brand I stumble upon often because it's the only one allowed on my desk. Why, you're asking me? With my polish stash growing and growing rapidly, my desk sometimes gets taken over by polishes from new orders or older bottles I took out the drawer to play with, but never put back. So occasionally my desk looks like a crime scene where a nail polish bomb has exploded, which makes working there pretty hard. That's why I made a deal with myself one day allowing only my (25?) Essence Colour&Go polishes on my desk, because they're small and look cute together. So since there aren't that many other brands on my desk to choose from like there used to be, I happened to make another skittle that's Essence only. The polishes I used, all from the Colour&Go collection except for Bella:

Sundancer
What Do U Think?
You're The One
Ultimate Pink
Bella

So how's your desk doing? Anyone else who (unintentionally) uses their desk for storaging polishes?

4th of July nails


Hello everyone! For today's post I made 4th of July nails for my American readers. Holidays are always a fun theme for manis, so I was very excited to do some nail art for Independence Day, eventhough I do not celebrate it myself. The look is clearly inspired by the American flag, albeit with subtle changes, and tape was my #1 tool. I really couldn't have made the designs without it.
In total I used four different polishes: a red from Etos (Dutch drugstore), China Glaze's 2030 as my gold, First Mate as the blue base color and for the white stripes I used China Glaze Millenium, which is a silver. I picked a silver instead of a white because I thought it would pop more. But also because I didn't want the stripes to look too much like a candy cane or a Christmas elf ;) As mentioned earlier, tape was my magic helper in this little project. I used it to create both the stripes and big star shapes, which are supposed to be stylized fireworks, can you tell? ;)


To make the firework shapes I basically used the same technique as the one for the zigzag pattern, only I started at one corner of the tip, working my way back to the beginning of the nail (at the cuticles). So I started with the blue, then the gold on top and finally I applied the red. If you don't know what I'm talking about, just visit the tutorial for the zigzag pattern and hopefully it will all make sense then :)

Of course our flag wouldn't be complete without stars, so I added those afterwards with a (nameless) stamping plate from Essence.


I hope you guys like my first 4th of July nails and that they may have even inspired you to make a cute mani for monday :) Thanks for reading!

Cool skittle


Hello everyone! I hope you are all doing fine. For this post I have a skittle to share with you from some time ago. I was playing around with some cool toned colors, trying to find an interesting color scheme, and these are the polishes that I used:

China Glaze - For Audrey
Essence - Tryin' To Be Cool
China Glaze - Secret Peri-winkle
Essence - Movie Star

Then I used my favorite chunky glitter topper from Essence: Blaire! I love the different sizes of glitter and they're even prettier when they're mattified! Speaking of matt, I just bought a new matt topcoat from Claire's and I used this opportuntity to try it out (see last picture). But I think I'll stick to my #1 matt topcoat from Essence, the finish from the one from Claire's is more satin-like and that's just not matt enough for me ;)


I do feel like the combination of colors I used is a bit odd, but at the end of the day it's not that terrible, right? Hahah. What do you guys think of it?

Cute skittle

Hi lovely followers, today there are over 500 of you! I can't believe there are so many people following this little blog of mine! I couldn't even fill my wedding with this many people! Not that that has something to do with it or that I'm intending to get married soon, just saying 500 souls is a lot, haha. Thank you so much for reading Nailside and leaving your comments, it makes blogging so much fun! Okay, let's have a look at my NOTD then. (Pic heavy!) For this happy day I decided to do something happy, in a cute way. So I did a skittle in pastels. I suppose the pink on my thumb doesn't count as a pastel, but it fitted the rest so well :) The polishes I used, from my thumb to my pinky:

Essence - Let Me In Pink
Essence - No More Drama
Rimmel - Aqua Cool
China Glaze - For Audrey
Orly - Ancient Jade


And then flakies! ...to add some 'Wooow', lol. This time I used Golden Rose #4


And just for fun a layer of matt topcoat, to see how it would look. After the pics I made it glossy again, because this time I actually liked it better shiny :)

Awesome sauce from Golden Rose: #4

Thanks for stopping by again!

Essence skittle


Hi everyone! For today's post I'd like to show you a skittle I made with five Essence polishes from the Colour&Go collection; Perfect Plum, Lime Up!, Trust In Fashion, Just Rock It! and Break Through. Though I don't do skittles very often, I do like them very much. It's so simple, and I love simple :) Just pick five matching colors and BOOM! Awesome result. Zero effort. And it's an efficient way to go through your untrieds. Though I liked my skittle plain, I just couldn't leave it alone. I layered it with a beautiful flaky polish from Golden Rose Scale Effects, #15, which came from my untried stash. It's so pretty! And yes, then I mattified it... I'm really starting to get predictable... Anyways, hope you like it and thanks for reading :)

Golden Rose Scale Effects - #15

Muted skittle


Hello readers! For this post I'd like to show you a skittle mani I did recently. I was actually just swatching a few of my new polishes when I noticed they matched some polishes on my desk. These are the colors I used, starting with the one I used on my thumb.

OPI - Mrs O'Leary's BBQ
Hema - #82
H&M - Dazzling Jade
Essence - Let Me In Pink
Rimmel - Fancy Fuchsia

And this is where the magic happens, haha. Lately I've been hooked on the glitter topcoats from the Essence Nail Art Twins, I already posted about Blair and Edward. So here I layered Blair over my muted skittle, I think it really adds something special. What I love about Blair is the different sized glitter and also the fact those glitters aren't "plain" silver, but dark silver/grey, which I don't see that often.


And some of you might have already expected the following... ;) Matte topcoat!
Thanks for visiting :)

Aladdin


Hi everyone! A little while ago I made this Aladdin mani for the Disney nail art contest by Orlica at Confessions of a Polishaholic.

So my Disney mani was inspired by Aladdin, my absolute favorite Disney-movie. When I was a little kid, I already loved the movie and had a crush on Aladdin, lol! And now that I'm older I still enjoy Aladdin, maybe even more because now I finally understand all the words, songs and jokes :) Everything about the movie is just wonderful; the visuals, the script, the AMAZING songs and of course all the characters! So on my nails I have 5 favorite characters depicted, the magic carpet, Genie, Aladdin, Jasmine and of course little Abu! All are freehanded with tiny brushes and an ocean of patience... And as a finishing touch I added some rhinestones to the magic carpet on my thumb and Jasmine's headband.

So go check out all the 22(!) amazing entries and vote for mine if you truly think it deserves to win! And make sure you're a GFC follower of Confessions of a Polishaholic or you won't be able to vote!

EDIT: The other day Orlica announced the winner of the contest, which was Kleopatre. She made a really cool Cruella de Vill mani, it was one of my favorites in the competition and truly deserved to win. So sadly I didn't even make it to the top three, haha, but I had a lot of fun making the Aladdin mani and just wanted to say thanks to those who had voted for me :) So thank you!

Designs for Queen's day


Hi everybody, tomorrow it's Queen's day in the Netherlands. Queen's day is our national holiday when we celebrate the birthday of the Queen. This day is known for its free market, everybody is allowed to sell things on the streets, so it's a great day to (try to) get rid of your old crap and go treasure-hunting for someone else's :) Also people dress up in orange, as reference to the royal family (House of Orange-Nassau).

So for the big day I made some appropriate designs for my Dutch readers. On my pinky there's the plain Dutch flag, made with tape. Now some might say it's France's, but that just depends on what angle I'm holding my hands in :) Either way, making this pattern vertically is easier than horizontally, so that's what I did ;-) I started with the white and then placed a tape strip in the middle, after that I used a blue and red creme to complete the flag. As you can see I did the same on my middle- and ringfinger, but those are spiced up with gold accents: leopard print and a crown-shaped tip. The gold I used is 2030 from China Glaze. And people with less patients can do the fun layering-combo of an orange polish, layered with gold glitters. I used H&M Neon Orange and China Glaze Medaillon.
For a simple mani just pick one or two designs as accent nail. Or you go wild using all of them for a skittle mani. And if you're semi-lazy like me, you can go for taped flags on one hand and go full orange on the other.

I hope you like the ideas! I wish I could've posted these earlier but I just didn't have the time to. Anyway, enjoy tomorrow! And to the rest of the folks: I've got some nice layering combinations planned for the next couple of days! So see ya then! :)

Hello Kitty!


Hi guys! Wow, I can't believe I already have over 100 followers! Thank you to each and every one of you for taking the time to read this blog and leave comments. I'm so glad that you're enjoying and inspired by my designs, because that's what this blog was created for. To the mani then!

So this time I decided to do a Hello Kitty mani, I had just received my free Hello Kitty imageplate from Born Pretty and couldn't wait to play with it. I used the imageplate on my ring finger which was already covered in two coats of Essence Stamp Me! White, after that I just filled in the bow and her nose with a tiny paintbrush. The rest of my fingers all have a different cute design, which - combined - create a playful look. The base color is a warm baby pink from Hema, unfornately I don't have the number anymore but I do think it's still available. On my thumb you can see two little flowers, they're stickers I once bought in Hong Kong and though they're not meant for nails they stick pretty wel on the surface. On my index finger I painted the Hello Kitty bow with (how appropriate!) Kitty Queen from H&M's Hello Kitty cosmetics collection and a black creme. My middle finger is done with even sized tape strips and the red is 022 from DA, a local drugstore. And finally I used Konad's M79 on my pinky, 'cause polkadots and Hello Kitty are BFF's for life :)

Thanks for reading and take care!

Hello Kitty imageplate from Born Pretty

Cute flower stickers!