Showing posts with label Foil. Show all posts
Foil Water Marble
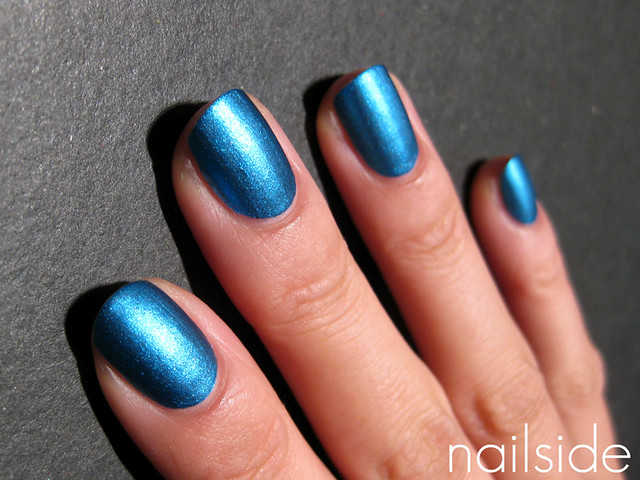
I'd never thought I'd be able to do, let alone love, water marbling, but here I am with another marbled mani. This time I wanted to do a darker one, using H&M Kiss Goodnight and Orly Sweet Peacock, which is the sparkly blue.
From my last water marbling attempts, I've learned that not every polish is suitable for it, so I wasn't surprised when that was the case with Sweet Peacock. It was hard to draw neat, controlled petals in the polish. But that actually didn't bother me at all, as my nails were left with these beautiful, more natural swirls of polish instead. Clean-up, however, was less beautiful! Despite having taped my fingers before dipping them in the polish, it was almost impossible to get them clean. So I took these pictures the day after, when most of the foily shimmer was finally gone after a long and hot shower. ;-) Thanks for stopping by!
Diagonal crackle mani
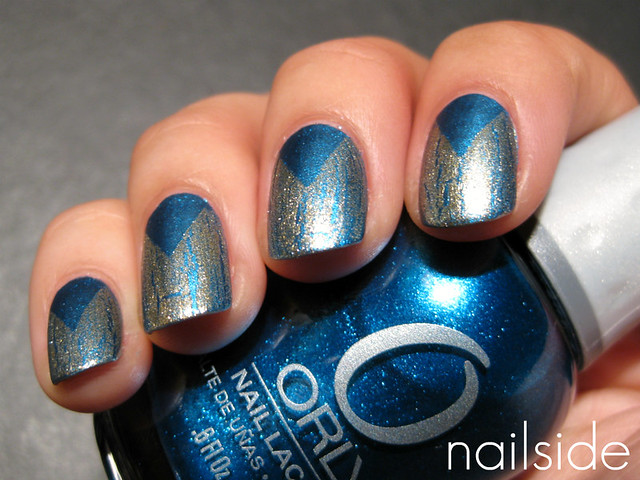
Hi guys! For this post I have a diagonal tape mani to share with you. I just love those! They're so easy to make and a great way to combine polishes and different finishes. Today I didn't feel like spending too much time on my nails, so this was perfect. I applied one thicker coat of the navy creme China Glaze First Mate. Because it was just one coat it dried pretty quickly, so soon after I could place a tape strip on each nail. I knew I wanted a silver for the tips, but to add something special I picked a silver crackle polish: OPI Silver Shatter. It's so super shiny! Finally I added a fastdrying topcoat and my mani was done :) Thanks for reading ^^
Blue stars
Hello everyone :-) Today I have an older mani with blue stars to show you. I was very excited to make another starry mani with my new Essence stamping plate (called Be Creative!), after liking the gold version so much. Because Orly Sweet Peacock is such a striking blue and has a foil finish, which often covers very well, I picked that color to fill in my stars. The result didn't turn out as awesome as I hoped though, the blue was very subtle so the star shapes weren't so noticable, I mainly saw blurry, shimmery spots of blue when Iooked at my nails from a distance. Quite interesting, but not enough to keep the mani on for very long. I am loving that stamping plate though, so it probably won't be long till I'm doing yet another star pattern look ^^
Art Deco chevrons
Hello guys! First of all, I'd like to thank everyone who wished me a happy birthday in my last post, it was very nice to hear, but I just celebrated my birthday last month, haha. The birthday nails were specially made for a reader who requested a birthday mani for her own special day ;-) So no birthday presents to share with you, but I do have these elegant chevrons in Art Deco style. The pictured bottle of polish, which I used as my base color, is M91 from a new cosmetics brand called Make-Up Studio. They carry a huge, colorful collection of eye-shadows, lipsticks, blushes, brushes, fake lashes etc. and... nail polish :) They just opened a brand new store in our local shopping mall, so last week I went for a look and M91 was one of the products I came home with. It's a dusty green creme which is close to Mint in Wikipedia's List Of Colors. The formula was pretty nice but the best thing is it covers in one coat ^^ I own quite a few dusty, grey-ish greens/mints, but none of those is similar to M91. So I'm happy to have yet another one in my stash! It's a shame though, that Make-Up Studio didn't give their polishes a real name, instead of just a number. They've got quite a few unique babies in their collection that truly deserve more identity. I admit they do cost a lot (€12.90 for 12ml/0.41fl.oz.) but as I said, some are really unique and worth the money, if you want to spoil yourself :) Anyhow, the day after I added the first chevrons with tape, using China Glaze's Jitterbug. The little chevrons at the tips were made with China Glaze Ink. It's a striper polish with a perfect covering formula, the thin brush is perfect for making stripes but also for freehanding, like I did here. It came in really handy, because I felt way too lazy to wait for another coat of polish to dry, like I would've if I used tape again. Finally a layer of Essence Matt top coat and tada! Thanks for reading :)
Jitterbug's BBQ
Hello everyone! I can't believe it's already been five days since my last post! This week's been so busy, that after I had removed this mani, I didn't even have the time or energy to repaint my nails. They're actually still naked! But I'm planning on changing that tonight :) Anyhow, for right now I have this diagonal tape mani to share with you. My base color was OPI Mrs O'Leary's BBQ. But when it started showing tipwear, I decided to add Jitterbug from China Glaze to the tips, using tape. The base color was already dry, so it only took me a little while to create a fresh mani.
Guest post for Oooh Shinies
Vintage clouds
Hi guys! For this post I have another request to show you. A little while ago I received an email from a reader who wanted me to come up with a funky mani for her informal dance soon. A few colors she liked were teal and coral, so I combined them in this "funky clouds" look. I like how simple this design is to achieve. Just pick three matching colors, one for you base color and two for the cloud shapes on top. The clouds are made by applying three strokes of polish next to each other, each smaller than the one before. My tip is to leave enough polish on the brush (but not too much!) so that when it touches the surface it will leave a nice, round dot as start point. This doesn't even need a lot of precision and you can just use the brush from your polish for this. And that's it :) Though I would advise using a fast drying top coat afterwards if you don't want to wait too long for your nails to dry, after all it's three coats of polish. (Four if you include base coat.) I like the way it looks here with plain cremes, but for a more festive look, a layer of (iridiscent) glitter can be added.
The polishes I used:
Essence - What Do U think? Version 1 (It looks less orange in real life)
China Glaze - For Audrey
Essence - Bella
Gameboy nails
Hi guys, guess my nails! I'm not even sure if you can say that. And the title might've been a big hint haha... but they're gameboy nails :D I made these for a reader who is going to dress up as gameboy for halloween, how cool is that? I thought it was such a fun theme and was beyond excited to work on them. My base color was Essence Got A Secret and I freehanded all the gameboy features with a tiny brush. For the glamorous index finger I used Orly It's Not Rocket Science, it's supposed to be the screen. The screen's kind of green, right? ;-) Anyway, hope you like them and goodnight everybody! :)
Other polishes I've used:
OPI - Dim Sum Plum
China Glaze - Concrete Catwalk
V-gap and OPI Gold Shatter
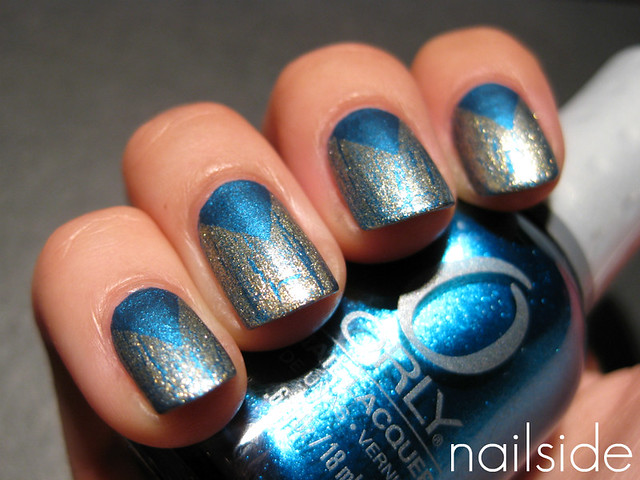
Hi guys! Yesterday I showed you my post with Orly Sweet Peacock, today I have the V-gap I made with it. First I mattified it with Essence Matt topcoat, which made it look stunning. Sweet Peacock is so sparkly that even with a soft, matte finish it still sparks like a gem. For the V-gap I placed triangles to cover up the blue and I applied OPI Gold Shatter on top. Gold Shatter is another new polish that arrived in my mailbox this week and I couldn't wait to try it out. Though blue and gold is always a win in my book, I'm not exactly crazy about this look. I like the colors but maybe there's just too much going on. Oh well, next time better :) What's your opinion?
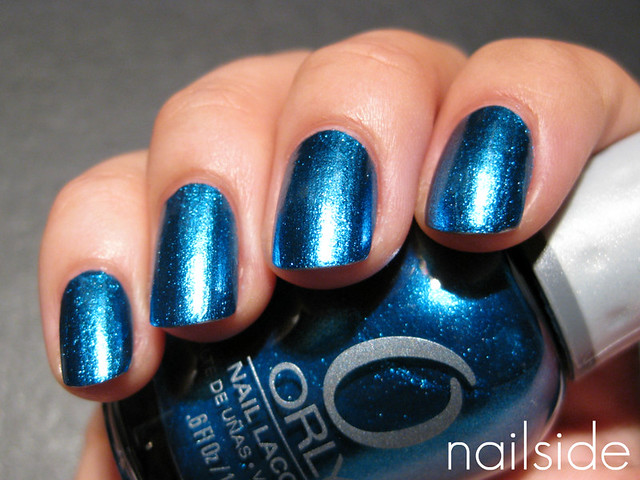
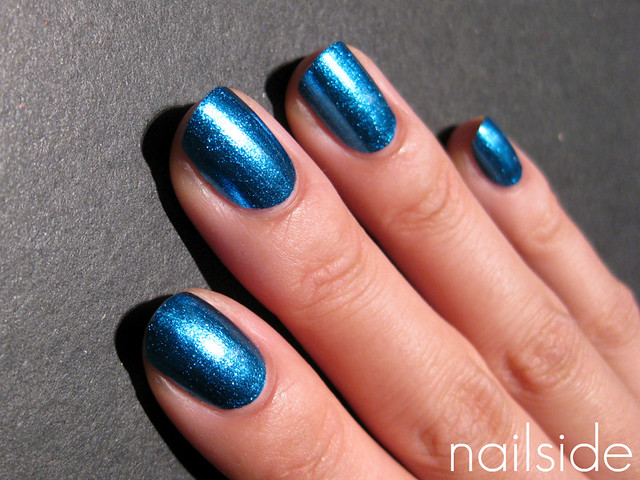
Orly - Sweet Peacock
Besides Sweet Peacock I also bought Lucky Duck from the same collection. I haven't swatched it yet, but it looks really good based on the bottle, so I'm sure it won't be long till it appears here :) Which polish(es) did you get from the Birds of a Feather collection?
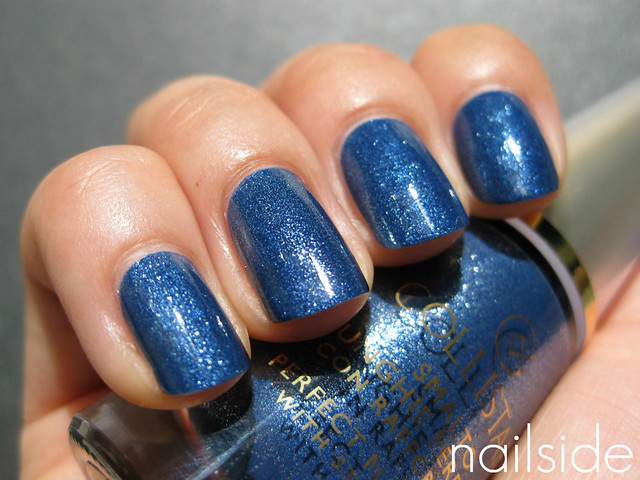
Collistar - Blu Lamé
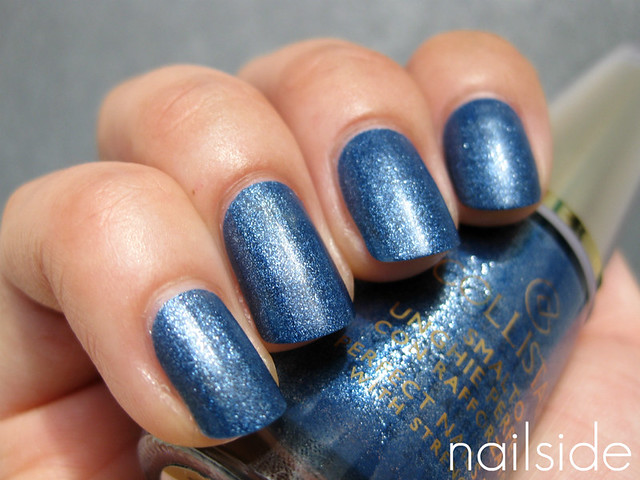
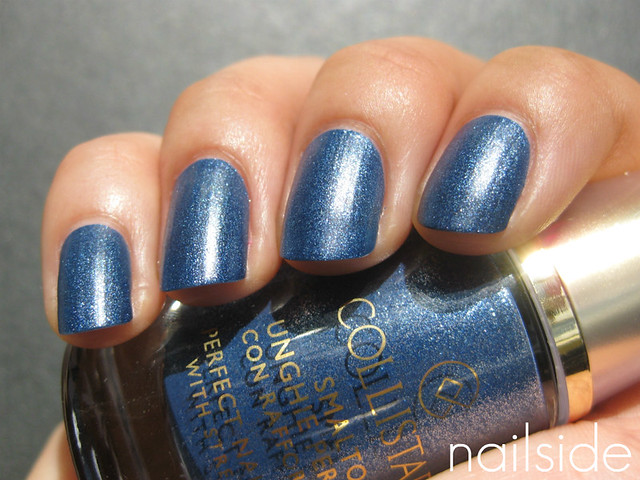
Hi everyone, for this post I have a blue gem to show you, Blu Lamé from the Italian high end cosmetics brand Collistar. Blue Lamé is my first high end polish. I paid €12.50 for this bottle of 10ml/0.3fl.oz., which is an amount I rarely spend on polish. But this looked so, so beautiful in te bottle. A denim blue with silver shimmer, which dries with a foily, satin matt finish which reminds of the OPI Suedes. Blue and shimmer and foil and matt, how could I ever resist that, right? Well, I didn't :) In the store I was still hesitating if I should buy it or not, considering the high price, but finally the beauty of it won me over and besides, I hadn't bought nail polish for a while at the moment. Anyways, Blue Lamé... Words can't express how pretty I find it. Look at that finish! And it's just as pretty with a glossy topcoat. But the perfection doesn't stop there, it's also a true one-coater! And with the best formula you can imagine, it makes it so pleasant to apply. And even though it's a matt polish, the formula is very smooth and it doesn't dry too fast, so you can just comfortably apply everything nice and even in a quick 'swoosh'. So yes, it costs more than other polishes, but it's definitely worth it. Needless to say it's one of my favorite polishes, ever! ;)
 |
| With topcoat |
V-gap
Hello everyone! For this post I'd like to show you another tape mani I did this weekend. I was wearing OPI Mrs. O'Leary's BBQ and the next day I wanted to spice it up, so this is what it became. It's not Sophy Robson's famous V-gap, but still a V-gap right? ;) It wasn't an easy choice finding a color other than black to suit the burgundy red of Mrs. O'Leary's BBQ, but then I remembered saying in a previous post how China Glaze Jitterbug just goes with any color, so this was my chance to prove it, haha. I think Mrs. O'Leary's BBQ looks really pretty with Jitterbug and that the whole design looks kind of editorial. I also mattified it to see what it would look like and I still haven't decided yet which version I like better... Help me out! Haha.
Thanks for reading! :)
Dating a laser mani
Hi guys! For this post I have a laser mani to show you. I used yesterday's mani for it, OPI Dating A Royal. And on top of it I used China Glaze Jitterbug, a stunning must-have polish, in my humble opinion. It has a dark grey base with a foil-like shimmer finish, which looks edgy on its own, but matches any other color as well. I like it a lot :) To make the laser pattern show up better I added a matt topcoat afterwards, the one I use is from Essence.
If you like to do this look yourself, just have a look at the tutorial. It's quite simple and a fun way to combine different colors or finishes. Thanks for reading!
Evil enemy nails
Hello dear followers! After a superhero mani there should of course be an evil enemy mani as well, hahah. It's still a lightning bolt design, but this time it's used vertically instead of horizontally as a funky French. To achieve this look I placed the tape strips as described in the tutorial. Only to make the pattern vertical, the position of both tape strips had to be twisted 90°, so that's basically it. (In this case I also unintentionally mirrored the design, but that doesn't affect the final look, as long as the design's twisted 90° it will come out vertically.) How to "double" the lightning bolt is a bit difficult to explain (and boring to read, lol) so I will make an individual tutorial on how to do that soon, with pics ;)
The gold base color is China Glaze Millenium, the black Where's The Soiree? from Color Club and the dark silver foil is from Hema (a Dutch department store) and looks pretty similar to China Glaze Jitterbug and OPI Lucerne-tainly Look Marvelous.
My boyfriend thinks the mani is "badass", haha, what are your thoughts?
Diamond Cosmetics - Sparkling Sherry
Great job, Diamond Cosmetics! Sparkling Sherry is a stunning, berry-pink foil and what every polish should be like. It covers in one coat, almost applies itself and dries fast. No clean-up necessary. It's so pigmented, so vibrant, so gorgeous, A+!
Tags :
Diamond Cosmetics +
Foil +
Pink
First Mate funky French
Hi y'all! For this post I made a funky French with pretty First Mate from China Glaze and a silver foil from Claire's. Whenever I see Claire polishes mentioned at international blogs, they always have an own name. But the ones sold in the Netherlands don't, not even a number! Anyway, just wanted to let you know that funky French manis are awesome, they're perfect to cover up tipwear or VNL and a fast way to spice up your current mani, if you're going from work to a party or just because you get bored of a mani quickly. Thanks for reading!
 |
| First Mate au naturel |
Tags :
Blue +
China Glaze +
Creme +
Foil +
Funky French +
Silver +
Tape mani
Lightning bolt French - mattified
Hi everyone! Yes, I mattified my mani, again! Haha. Don't you just love how a matte topcoat can completely change a look, only by changing the finish?! They're especially great for graphical patterns like this one, the matte finish reduces reflections so the pattern is more visible :) Have a great night!
Tags :
Black +
Blue +
Foil +
Funky French +
Lightning bolt +
Matt +
Tape mani
Lightning bolt French
Hi lovely readers and new followers! Today I want to show you a new tape-desgin: the lightning bolt French! I came up with this idea to cover up tipwear of an old mani. Again, this design is very simple and easy to make, once you've gotten the hang of working with tape. I'd say it's as easy as the mummy pattern (which wasn't too bad, right?), only it takes less time! Because you need less tape strips. I'm pretty excited about this design, because it's graphical, edgy and easy to create, and I hope you are too :) If so, you can expect a tutorial on this design very soon...
I used Color Club Where's The Soiree? as my base color and the blue foil on top is from Hema, a Dutch department store.
Enjoy your day!
I used Color Club Where's The Soiree? as my base color and the blue foil on top is from Hema, a Dutch department store.
Enjoy your day!
Tags :
Black +
Blue +
Foil +
Funky French +
Hema +
Lightning bolt +
Tape mani
Time to rock!
Good evening, y'all! Today I have another tape mani for you! (Anyone getting tired of them already? Lol.)
The base color I used is China Glaze Designer Satin, a lovely dark magenta. On top I applied It's Time To Rock from Sephora. I purchased it yesterday and I'm so glad I did because it's one of my favorite polishes already! It's Time To Rock is a multichrome foil, with a dark silver base and depending on the light it has hints of blue and pinkish purple and every shade between that. The picture below isn't completely color accurate but it's the best I could do.
Another thing I love is the tape pattern, which is so simple to create. All you need to do is cut tape strips in random sizes and apply them randomly underneath each other on the nail. So it's almost as effortless as the laser mani, but even more because you don't have overlapping strips therefore little to no chance of messing up. Guaranteed win! So I'll be doing this design more often :)
And as you can see, I didn't apply topcoat, but I kind of like the uneven surface, it actually makes the design quite playful. Thank you for reading!
 |
| Sephora - It's Time To Rock |
Bluesy checkers
Hello readers! I really wanted to show you this gorgeous blue foil from Hema, a Dutch department store. It's such a beautiful polish and I've never seen anything like it. Even though the color is perfect one its own, I couldn't stick to just one color. So I taped it and added China Glaze Calypso Blue. Calypso Blue is a very dark navy, I love the color but unfortunately it stains very bad which keeps me from using it as often as I would like to. But since I already used another polish underneath, it will be fine.
There isn't much else to say about this mani, I'll just let the picture do the talking :)


