Showing posts with label Matt. Show all posts

Little Strokes of Metal


Hi guys, for this post I have these silver strokes to share with you. I just had to do some art deco linework again. I like how elegant it looks, plus painting those thin lines with a striper brush somehow has a very therapeutic effect on me.

The striper polish I used is Janet #201. It's not very opaque, which causes each line to look different in terms of coverage. But I actually like that, I think it makes the look more dynamic. The smokey purple basecolor is How I Matt Your Mother from Catrice. It dries with a semi-matt, so-called "brushed metal effect", which isn't really visible in the picture, but I just loved the color and the formula is great. That was it for today, thanks for reading! :)

Neon geometric Christmas nails


Hi everyone! I thought it would be fun to do a Christmas mani (Christmani XD) in neon colors. I already had the idea of building a Christmas tree and six-pointed star with see-through triangles using tape, and when I stumbled upon China Glaze Surfin' For Boys in my stash, I knew it would be the perfect color for the job. It's so incredibly bright! For these photos I used my iPhone5 camera, it's much more accurate with capturing the true color of Surfin' For Boys than my trusty old Canon IXUS 85 IS, but even in these pictures the brightness is nothing compared to seeing it in reality.

I combined the Christmas ornaments with random triangle shapes in neon yellow, teal and silver. The polishes I used were Orly Glowstick, Color Club Age of Aquarius and China Glaze Millennium. The 'white' basecolor (actually a super light grey) is Essence Enter Wonderland, a very pretty matt polish. To keep that lovely matt finish in the entire look, I finally sealed everything with matt topcoat. Hope you like it and thanks for reading!

Medieval Mani


I was going for a chic winter mani here but more ended up with this medieval/royal vibe. Didn't expect that! I like it, though. It kind of reminds me of the blue and gold fleur-de-lis pattern, often associated with the French monarchy.

I had high hopes for the blue polish. It's Hema #822, a dusty blue matt polish with bits of bright blue shimmer. The color looks pretty on the nails but it's a lot darker and the shimmer isn't visible at all. That's why I decided to spice it up with the gold lines and crosses, which I freehanded with a striper polish from the brand Janet (#115).

Thanks for reading and see you next time!

A little Surprise from the Vault


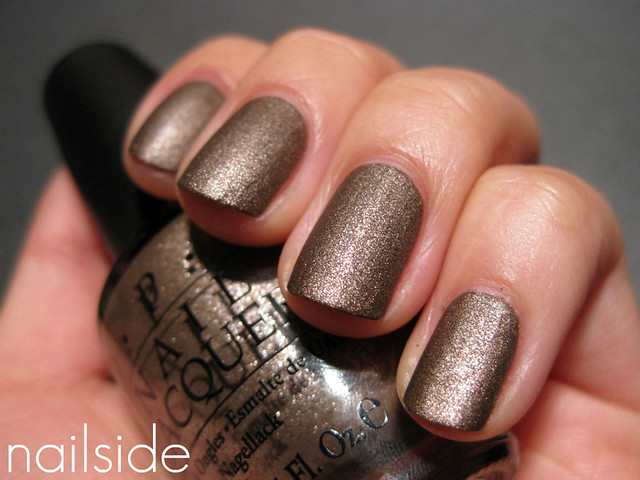
Hi everyone! Recently I reorganized all my old nail pictures and I came across a bunch of never posted manis, including this lovely tape mani from literally years ago. Brown has never been my favorite color when it comes to nail polish, but I actually think it works well with the colors I used here. The gorgeous matt taupe is OPI You Don't Know Jacques Suede and I believe I used China Glaze 2030 and Orly Sapphire Silk for the unusual chevrons. No topcoat, because that would ruin the different finishes in all the layers. ;) Thanks for reading!

31 Day Challenge, day 22: Inspired by a Song


Hey everybody! I'm at day 22 of the 31 Day Challenge, which means I had to pick a song as inspiration. I never thought this challenge was going to be easy, but man, it was so much more difficult than I'd expected! A lot of songs have abstract titles, which are really hard to capture into something recognizable on the nails. And I did want to make something that people were able to recognize, rather than something artsy and abstract that could actually be anything. So I hope you guys indeed saw that pictured on my nails is a train. ;-) The symbolic train of John Mayer's Stop This Train. I think it's a touching song and I especially love the live version of it from his album Where The Light Is.

I really wanted to portray the speed and enormous size of the train, so what better way to do that than making it in Art Deco poster style? :-) The red basecolor is OPI's Big Apple Red, and for the vehicle I used a couple of different polishes and stripers, plus a little sponging for the steam and lights. At last a layer of Essence Matte topcoat and it was finished. Hope you like it!

Arrow Tail


There wasn't a lot of nail painting for me this week, school work took up most of my time. I did do another "arrow tail" design which I came up with while improvising for the tribal print challenge in my last post. There's just something relaxing about drawing the design that makes it such a fun task to do.

This time I used Orly Viridian Vinyl as my basecolor and I truly fell in love with it again. It only needs two smooth and fastdrying coats for opacity and the color's just fantastic! Finally I made the arrow print with a white striper. No topcoat was applied, because the satin-matte finish of Viridian Vinyl is too pretty!

31 Day Challenge, day 13: Animal Print


Hello readers! For this post I'd like to show you my attempt on challenge 13 of the 31 Day Challenge: a very literal animal print. It was a bit of an experiment as I used other materials besides nail polish: a Staedtler permanent marker and an Edding Deco Marker in white. Once the blue basecolor was dry (nameless polish from Claire's), I freehanded the curious animals on top. The markers seemed to attach well on the matte surface, the polish just needs to be completely dry before you can draw on it.

The animals in this print were supposed to be cats, but with a little imagination they can be any animal you like... Dogs, mice, pigs, ferrets... If you squint your eyes, they can even be the little black soot creatures from Miyazaki's Spirited Away. Oh, yeah, definitely going for the squinting. Love that movie! 

31 Day Challenge, day 12: Stripes


Hello readers! It's time for my 12th challenge of the 31 Day Challenge, which is stripes! I super love stripes, they make such an incredibly simple but effective graphic pattern. For this challenge, however, I didn't feel very inspired, so I went for trusty random stripes that I made with a striper polish; Janet #119). The design isn't new on this blog, but in the end I was surprisingly happy with the look. I could just stare all day at these nails, just because of the combination of two different finishes... Oh, well, at least I know some of you guys can appreciate that as well! ;-) The lovely matte basecolor is Orly's Purple Pleather, which I used two to three coats of. Thanks for reading!

Dark Zigzag


Hi everybody! Last post I showed you the amazing suede version of Suzi Skis In The Pyrenees from OPI. Because it dries so fast, it's a perfect basecolor for tape manis, such as today's. I covered half of my nails with triangle shaped pieces of tape and used my trusty black polish (Where's The Soiree? from Color Club) on top. Then I removed the tape strips and felt like a rock star... Rock on!

OPI - Suzi Skis In The Pyrenees Suede


Hello dear readers! I know it's been a while again, my apologies for staying away so long. I've been busy with packing and moving to a new place, and with concentrating on school. Or busy with life, in other words. ;) But my passion for nails is far from dead, so I'm trying my best to get back to posting regularly again. In the meantime I'll share some pictures from the vault with you, starting with OPI Suzi Skis In The Pyrenees, the suede version. I think it's absolutely gorgeous in all its simplicity. I really could look all day at that dark, grainy, matte finish. ♥ This was two coats. The application is alright; like with other matte polishes, you need to work faster because the drying time is quite short. But I like to see that as a plus, it makes this grey beauty an awesome polish for tape manis... ;)

Fifty-Fifty


Hi everyone! How are you? School's done, so I can FINALLY get back to blogging about nails again, yay! I can't believe how long it's been since my last post. So let's see some nails then!

For this fifty-fifty tape mani I used Orly Solid Gold as my basecolor. I rarely wear gold polishes on their own, but I just love to combine them with other colors. The same goes for Solid Gold. The color on its own just looks a bit weird on my skintone. But I do love the matte, shimmery finish. Plus it dries very quickly so it's a perfect tape mani basecolor. :-) After waiting just a few minutes after applying Solid Gold, I put tape strips vertically on one half of my nails. Then I used the turquoise polish Essence Bella on top, removed the strips and that's it! No topcoat afterwards, because I like the contrast of matte and shiny together. What do you think of today's nails?

Freehand '80s


Hi everybody! This is the nail art I made with H&M's Navy Cosmos as my base color. I was just playing around with my favorite nail art striper China Glaze Ink, looking for an easy freehand design. You all know I can't live without my precious tape when it comes to nail art, but let's face it, using tape can be quite time-consuming! So (easy) freehand designs are a nice alternative every now and then. :-) For this pattern that looks kind of '80s to me, I started drawing the zigzags on each nail. After I'd finished there was still something missing, so I used a dotting tool to fill in the empty spaces with big dots. I thought it turned out pretty cute in the end, but the best part was that the whole job was such a piece of cake. ^^ I used Essence Matt top coat for that ultimate matte finish, but below you can also see the glossy version that I just had to share with you. :) Hope you guys like it!

China Glaze Designer Satin + Essence Blair


Hello everyone and happy New Year! :-) For my first post of 2012 I have this simple layering combination of China Glaze Designer Satin and the amazing glitter Blair from Essence. Both are polishes that I can't live without. Though there may be many other pinks like Designer Satin, it has a special place in my heart because it was one of my first China Glaze polishes. The deep, berry pink color is timeless and can be both sweet and girly, and funky or edgy (I like it a lot in this mummy tape mani). Blair is part of an Essence Nail Art Twin together with Chuck. The different sized hexagons in a dark silver make it a very special polish, which can be worn over about any color, great over brights but also softer, muted shades like I did in this skittle. Of course everything had to be mattified afterwards, you know how I like matte glitters ^^ Thanks for reading!

Purple glitter fest


Good evening! As you may have noticed, I am feeling pretty glittery lately, for today I have a purple colored glitter mani to share with you. I remember not really being into purples at the start of this blog, but as time went by I got more and more used to them, to the point of even loving them ♥
In this post I'm wearing Essence Purple Magic, a beautiful medium blue-toned purple shimmer. (You can see swatches of it by itself here.) I decided to combine this little gem with my recently purchased W7 glitters and a champagne gold glitter, and I really like the outcome! The color scheme of purple, blue and pink has always intrigued me, and using it with glitter only makes it better ;-)

From left to right: W7 Blue Diamonds, W7 Purple Dazzle, W7 Pink Dazzle and Paris Memories #250

And now you probably want to see the matte version right? Yeah, me too ^^
As usual, I used my favorite matte topcoat from Essence.

Christmas Fever


Hello everyone :) For today I have the mani I made after finishing the tutorial for the Christmas tree design with tape. The tutorial already received many comments, so thanks a lot for that! :) The beautiful red base color is P2's Fever. I love how elegant Fever is, the shimmer's just gorgeous and the finish is especially great for this month of the year. In the pictures you can see that the bottle has a golden glow, however that's not the case in real life, just a plain and perfect red shimmer! For a higher party-factor, I added a coat of Milani Gems. It looked fine with the glossy finish, but I mattified it anyway, so I could see all the different colors better ^^ Thanks for reading!

Art Deco chevrons


Hello guys! First of all, I'd like to thank everyone who wished me a happy birthday in my last post, it was very nice to hear, but I just celebrated my birthday last month, haha. The birthday nails were specially made for a reader who requested a birthday mani for her own special day ;-) So no birthday presents to share with you, but I do have these elegant chevrons in Art Deco style. The pictured bottle of polish, which I used as my base color, is M91 from a new cosmetics brand called Make-Up Studio. They carry a huge, colorful collection of eye-shadows, lipsticks, blushes, brushes, fake lashes etc. and... nail polish :) They just opened a brand new store in our local shopping mall, so last week I went for a look and M91 was one of the products I came home with. It's a dusty green creme which is close to Mint in Wikipedia's List Of Colors. The formula was pretty nice but the best thing is it covers in one coat ^^ I own quite a few dusty, grey-ish greens/mints, but none of those is similar to M91. So I'm happy to have yet another one in my stash! It's a shame though, that Make-Up Studio didn't give their polishes a real name, instead of just a number. They've got quite a few unique babies in their collection that truly deserve more identity. I admit they do cost a lot (12.90 for 12ml/0.41fl.oz.) but as I said, some are really unique and worth the money, if you want to spoil yourself :) Anyhow, the day after I added the first chevrons with tape, using China Glaze's Jitterbug. The little chevrons at the tips were made with China Glaze Ink. It's a striper polish with a perfect covering formula, the thin brush is perfect for making stripes but also for freehanding, like I did here. It came in really handy, because I felt way too lazy to wait for another coat of polish to dry, like I would've if I used tape again. Finally a layer of Essence Matt top coat and tada! Thanks for reading :)

Guest post for Oooh Shinies


Hello everyone, I'm proud to tell you that the lovely and talented Bregje from Oooh Shinies has asked me to make a guest post for her blog, of course I said yes! :) So head over to Oooh Shinies for the complete post or click here.

Orly zigzag


Hello everyone! Since I didn't have much time to do my nails this week to post something, I decided to dig in the vault, look what I found! It's a zigzag tape mani I did in the summer with China Glaze Recyle for the grey and Orly's Viridian Vinyl and Purple Pleather for the tips, they were amazing to work with for the taping by the way. I expected the colors and zigzag pattern to pop more against the grey, but it became quite subtle actually. Still I like the matte and glossy finish combined in this mani :) What do you think about it? Thanks for reading!

OPI - You Don't Know Jacques Suede


OPI You Don't Know Jacques Suede wasn't a polish I immediately liked. But it had more to do with the color than the finish. Taupe colored nail polish was something I'd never seen before a couple of years ago, but it became very popular over the years and now every brand and even drugstores have at least one taupe polish in their collection. Since I discovered the regular version of You Don't Know Jacques, I started to appreciate taupes and quickly began looking for the Suede version, I absolutely love the grainy surface! And here it is :) I used two coats. The formula was okay to work with, it dries fast, but not too fast in my opinion. So you don't have to hurry to apply it neatly and when you're done it's dry before you know it. What do you think about it?

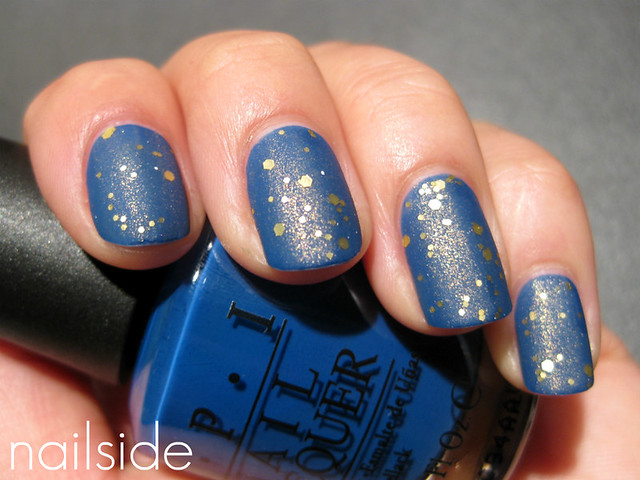
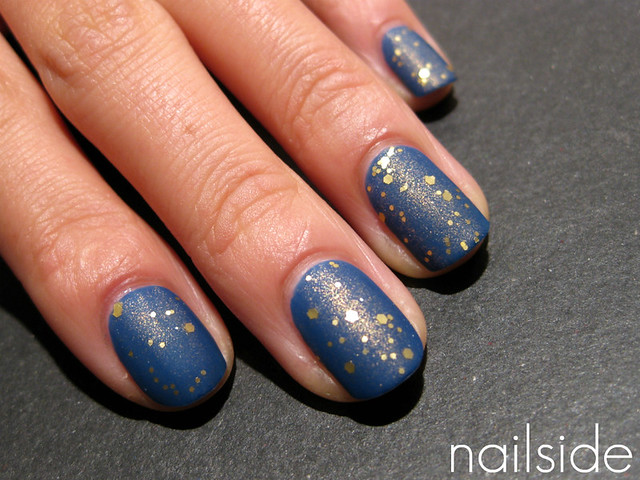
OPI Dating A Royal + Essence Make It Golden


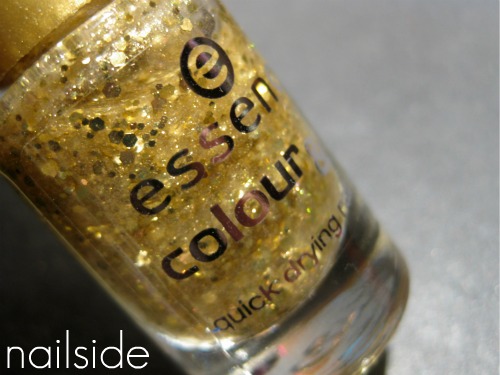
Hi everyone, how are you all? I hope everybody's had a great Halloween weekend. I really enjoyed all the Halloween manis I've come acrossed in the last couple of weeks, some were cute, some were scary and many were very funny :) I wish I could've shared some Halloween nail art with you myself, it's such a fun theme! But unfortunately the last few weeks have been the busiest so far this year. So no Halloween parties, but on top of that I also had to skip my birthday which was on the 30th. I'm 22 now! It's not that bad though, my party's just postponed ;) Anyhow, I'm rambling, let's talk nails! This is OPI Dating A Royal with a layer of Essence Make It Golden that I added the day after, and a coat of Essence Matt Topcat. Make It Golden is a glitter polish with tiny, tiny, golden microglitter and larger, multi-sized hexagons. I own quite a few golden glitter polishes but Make It Golden is actually something unique in my collection. The hexagons spread okay and the microglitters are pretty dense, but they don't completely cover the base color, which I'm pleased with. Another plus is the price, this golden beauty is only €1.29 for 0.16fl.oz/5ml. Not bad!